Wednesday, June 23, 2010

Boxkites WWI Aircombat Game


You double click the image and then save to print. This is placed in the bottom of a copier box lid. You use barrel thumbtacks to plug in the air speed and altitude. You can also use another tack to mark the protractor arc to plot moves. On the ground in the backyard you move the aircraft model 1 yardstick each time you get an asterisk in the turn phase. You get three shots per turn and you can fire in any phase at any time. Use 6 sided regular dice.

Questions in the comment box will be answered.
Click comment below.

Cheers

Saturday, June 19, 2010

Clothespin Aircraft in Action


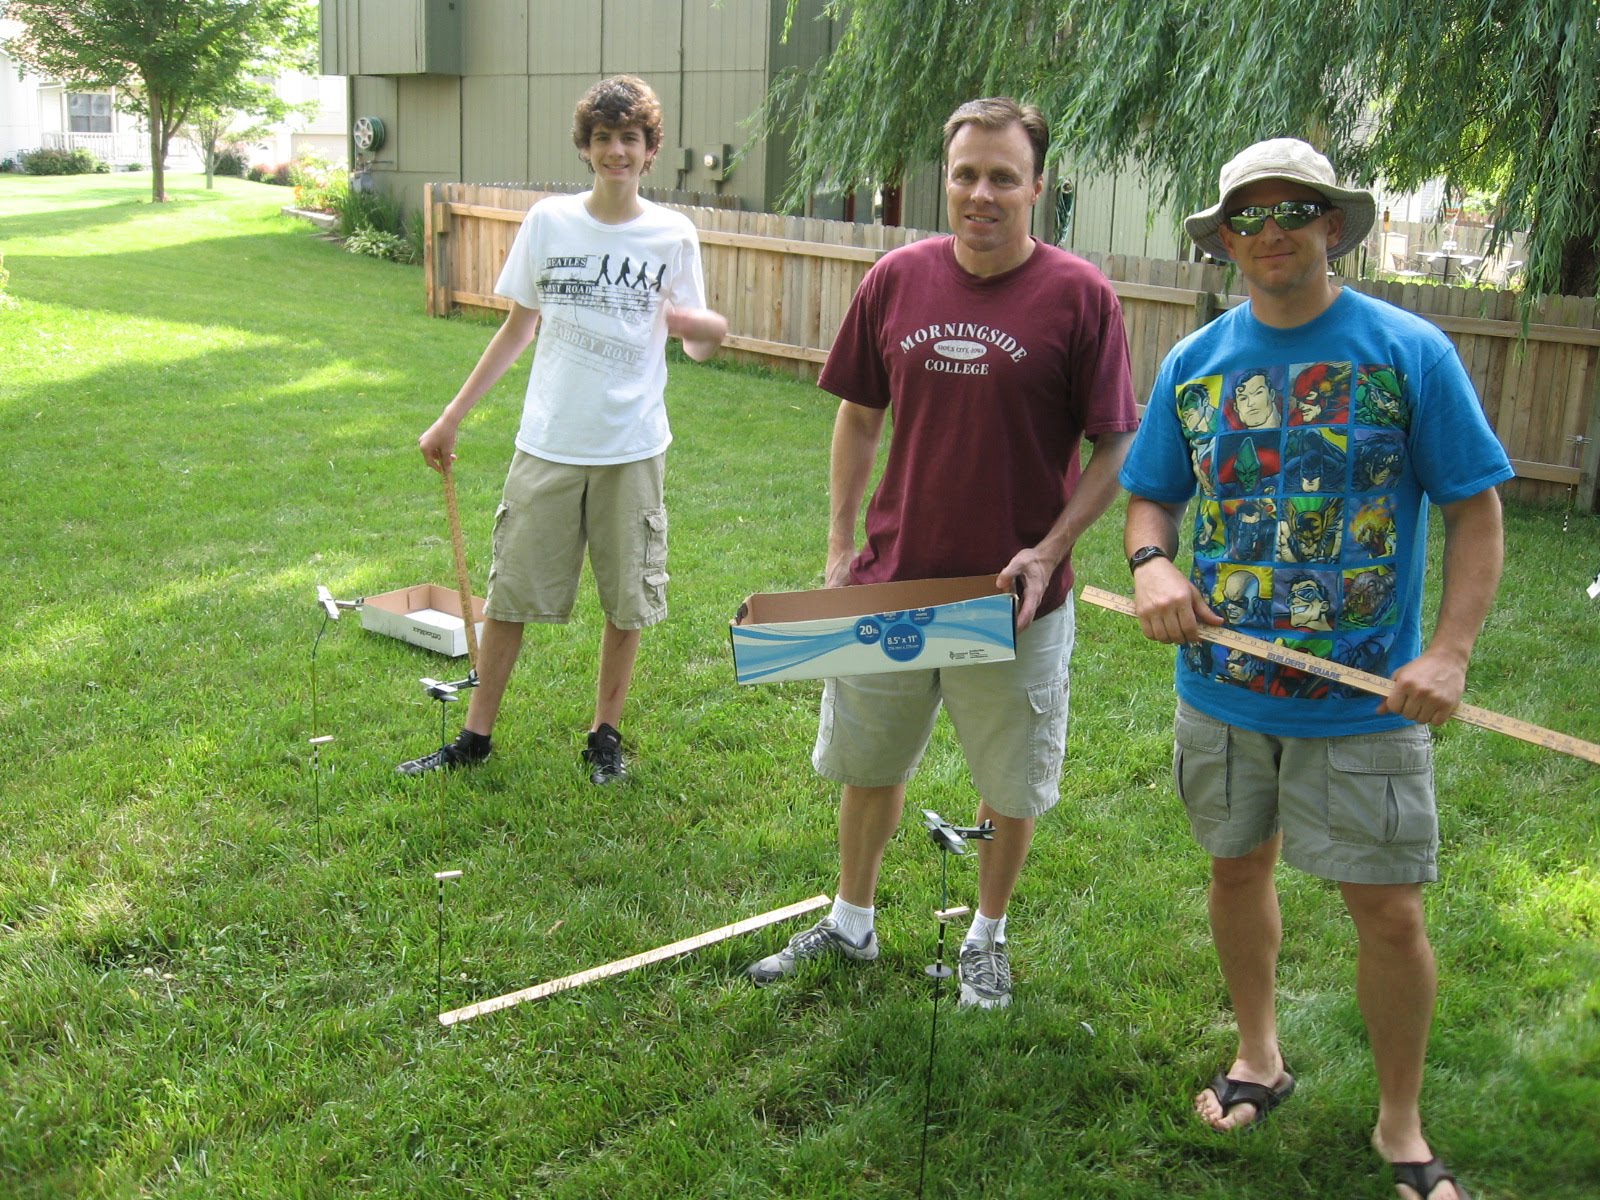
Backyard wargame tradition in the Lion's Den. This game has been played for years as a 4th of July morning wargame. Dawn Patrol! This year we ran a play test on June 19th.
Tony, Bill, and Ted fly for the allies. Airplane models are mounted on drill rod and stuck in the ground. The cardboard boxes have the control sheet, dice, fire markers, and thumbtacks for the game.
Brian was my ally on the German side.


Yardsticks are the movement increment. D6 are used to fire the guns.


Terry flys in for the Germans in game two.

Please double click this image to open a much better view of the aircraft models. It will improve your view of the homemade aircraft.

View from my cockpit in game two.
Great game with some fun wargame friends.
Enjoy.

Monday, June 14, 2010

World War I Aircraft Made from Clothespins

This craft is very popular and I would like to be able to send the plans for this to your email as a PDF.  If you want a copy of the plans for both of these aircraft please email: kenneth_vanpelt AT comcast.net This offer is valid as of 2016.
I am charging a nominal fee to help with the purchase of more craft sticks. If you use paypal to send me $6.00 I will send you a PDF or power-point that shows detailed instructions with all measurements and materials list for the WWI aircraft below.

Ready for action. The planes are made from clothespins. Two different styles - square pin and round. Wings are made from large flat Popsicle sticks cut to pattern. Machine-guns are from dowel.


Pilot is a plastic bead glued to a card-stock hole-punch. Decals are made from mailing label and some art copied off of the internet.

All aircraft were glued together quickly with a hot glue gun and the whole batch was built at one sitting.

My flying rules are in the image and you can see the simplicity of the game if you enlarge.

Enjoy.

Saturday, June 5, 2010

Clothespin Toy Soldiers Tutorial Chapter 3 Figure Decoration

In this chapter our figures take on final decoration painting and additional craft items.
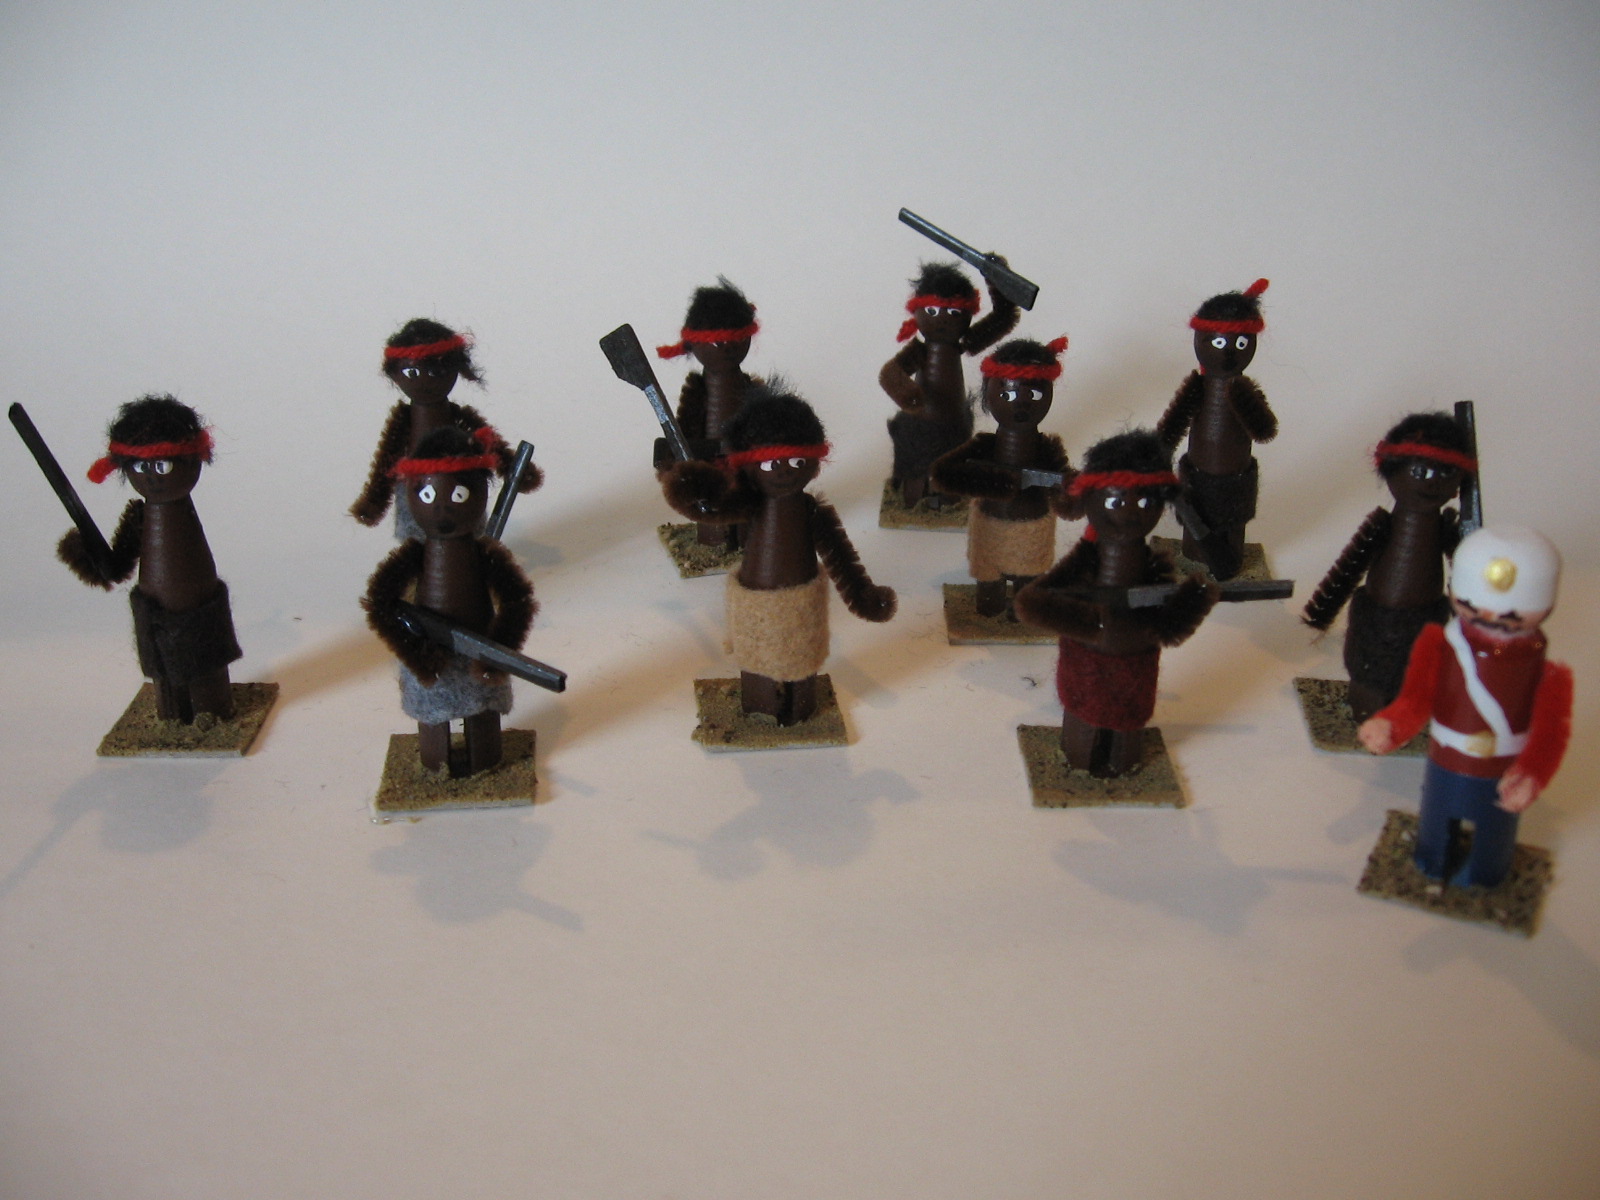
These Zulu in the following picture had felt loin cloths added and pipe cleaner arms pushed through the drilled hole. Our earlier made rifles are passed out and arms posed in a variety of ways to suggest a rabble. Items are hot glued into position.


Our British officer is attempting to get this Native Rifles platoon into manageable order.


These lads will serve on all of my crew served artillery and Gatling guns. These hands on the pipe cleaner are made by dipping the arm into paint once inserted into the figure. Kinda liked it at first but I have a better method now.


These figures are made up to serve as Natal Mounted Police. The clothes pins were selected for their particular deep head shape that suggests the helmet quite nicely. The hands are made from mailing label sticky paper and colored with a felt tip pen.

Full Squadron ready for action in the Natal frontier.


The clothespin horse. Pretty successful depiction with a limited palette. Three clothespins were used and cut in a variety of ways to get the parts. Two large flat pins and one small flat pin for the head. The horse neck is one of the tines cut from the large clothespin. Dismounted policemen nearby.


ZULU chief and his harem.

Natal Policemen and Zulu Chief discuss issues.

Saturday, May 22, 2010

Clothespin Toy Soldiers Tutorial Chapter 2 Painting and Rifles


Here is the pegs all primed. For the Zulu I use Walnut brown or Leather Brown suitable final color. Front rank is the NMP on their dismount peggs.


Secret ingredient for painting eys.


More secret ingredient revealed.


A trip to the barber. The tray contains black yarn that I cut from a wadded bundle into very fine fluff. A spot of white glue on the peghead and a dip in the tray and you have a hairy zulu.

This next section shows how to make quick 54mm rifles of the era.

A visit to the armory.


Cut to length.


Sniped with the edge cutters. Double click the image to see the rifle in the foreground. Two quick cuts and a craft stick pops into the silhouette of a rifle. I prme em black with india ink.


Rifles with a couple a brush strokes of pewter or gunmetal acrylic.

Next Chapter will be on dressing out the peg with arms, weapons, clothing or uniform detalis.

If your making some along with me please post a comment with info on a peek at your forces.

Wednesday, May 19, 2010

Clothespin Toy Soldiers Tutorial Chapter 1

Hello fellow craftees fans. This tutorial will show you how to make my ZULU set with clothespins. You will need. 1 bag of clothes pins 20+, cardstock scrap for bases. A saw - I use a miter saw and box.


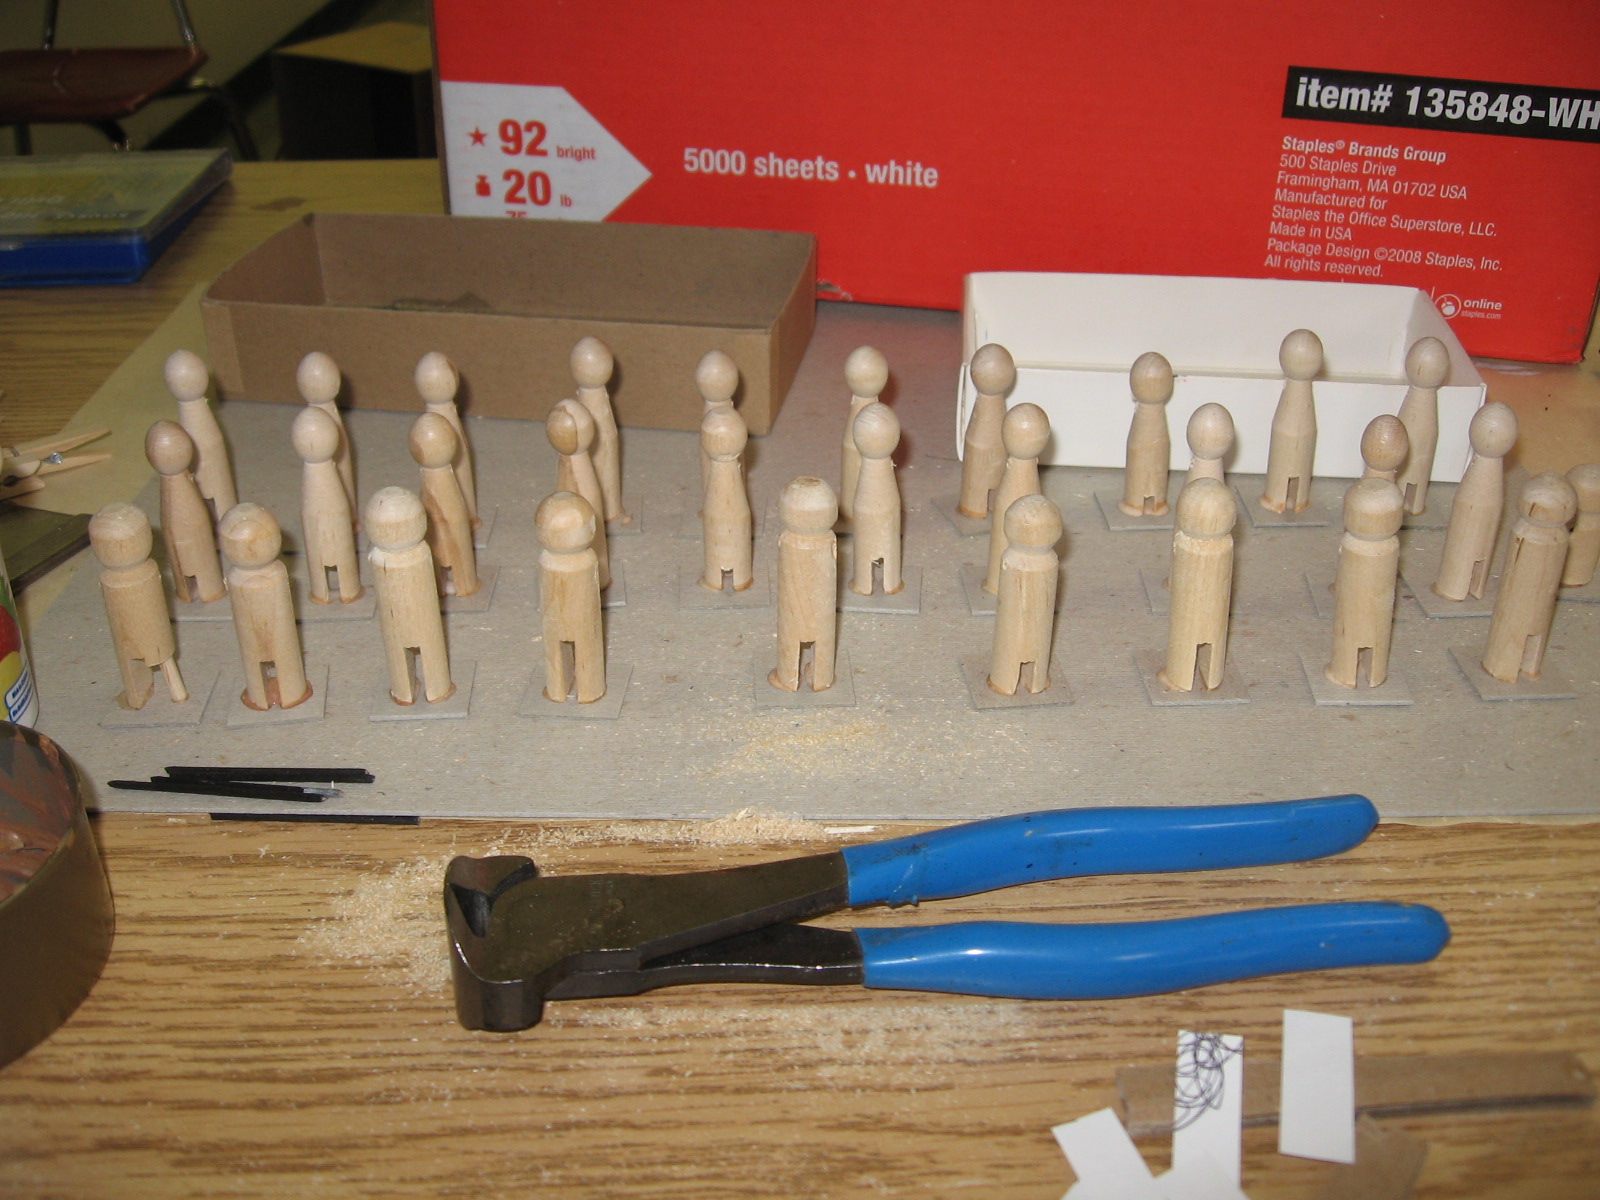
Cut your clothespin to 2" to 2 1/4" for a 54mm figure. I use a miter box and saw as pictured


I also work in batches of 20 + to create full units for GASLIGHT.


These figures are for natives. I am thinking they will be allied natives armed with rifles and with a red rag tied around their head. This image shows them on a cardstock jig to drill arm holes.


1/16" hole will allow the chenille wire for arms. The jig assures that the arm hole is perpendicular to the legs.


These lads will be my Natal Mounted Police. Look closely at the helmet spike!


I am also designing these to mount a horse and dismount onto an infantry stand.
The horse is not fully realized yet so these may end up just being glued to a base.


This is my idea for an infantry stand. The cardstock will be painted and flocked and the figure should squeeze onto the stand and remain.


These are my infantry, cut, drilled, glued to a 1" square. The two styles are going to make artillerists for the Brits. Native rifles. Zulu High command and a bevy of harem babes.
Next chapter will be on spray painting the figures. I use Wal*Mart cheap black and white primer, budget colored spray paint. You can prime these with any suitable figure primer.
They could use a seal of white glue but that would be extraordinary.

Monday, May 17, 2010

Zulu Wars 54mm Greenwood Mission Attack Pongola River Region

On May 16th, 17th, and 18th, 1879 the 12th Regiment of Foot (nearly half as good as the 24th), garrisoned Greenwood Station in the Pongola river region. Two platoons of infantry under the competent command of Lt. Dewey Wright withstood 4 separate attacks by Zulu tribal clans.
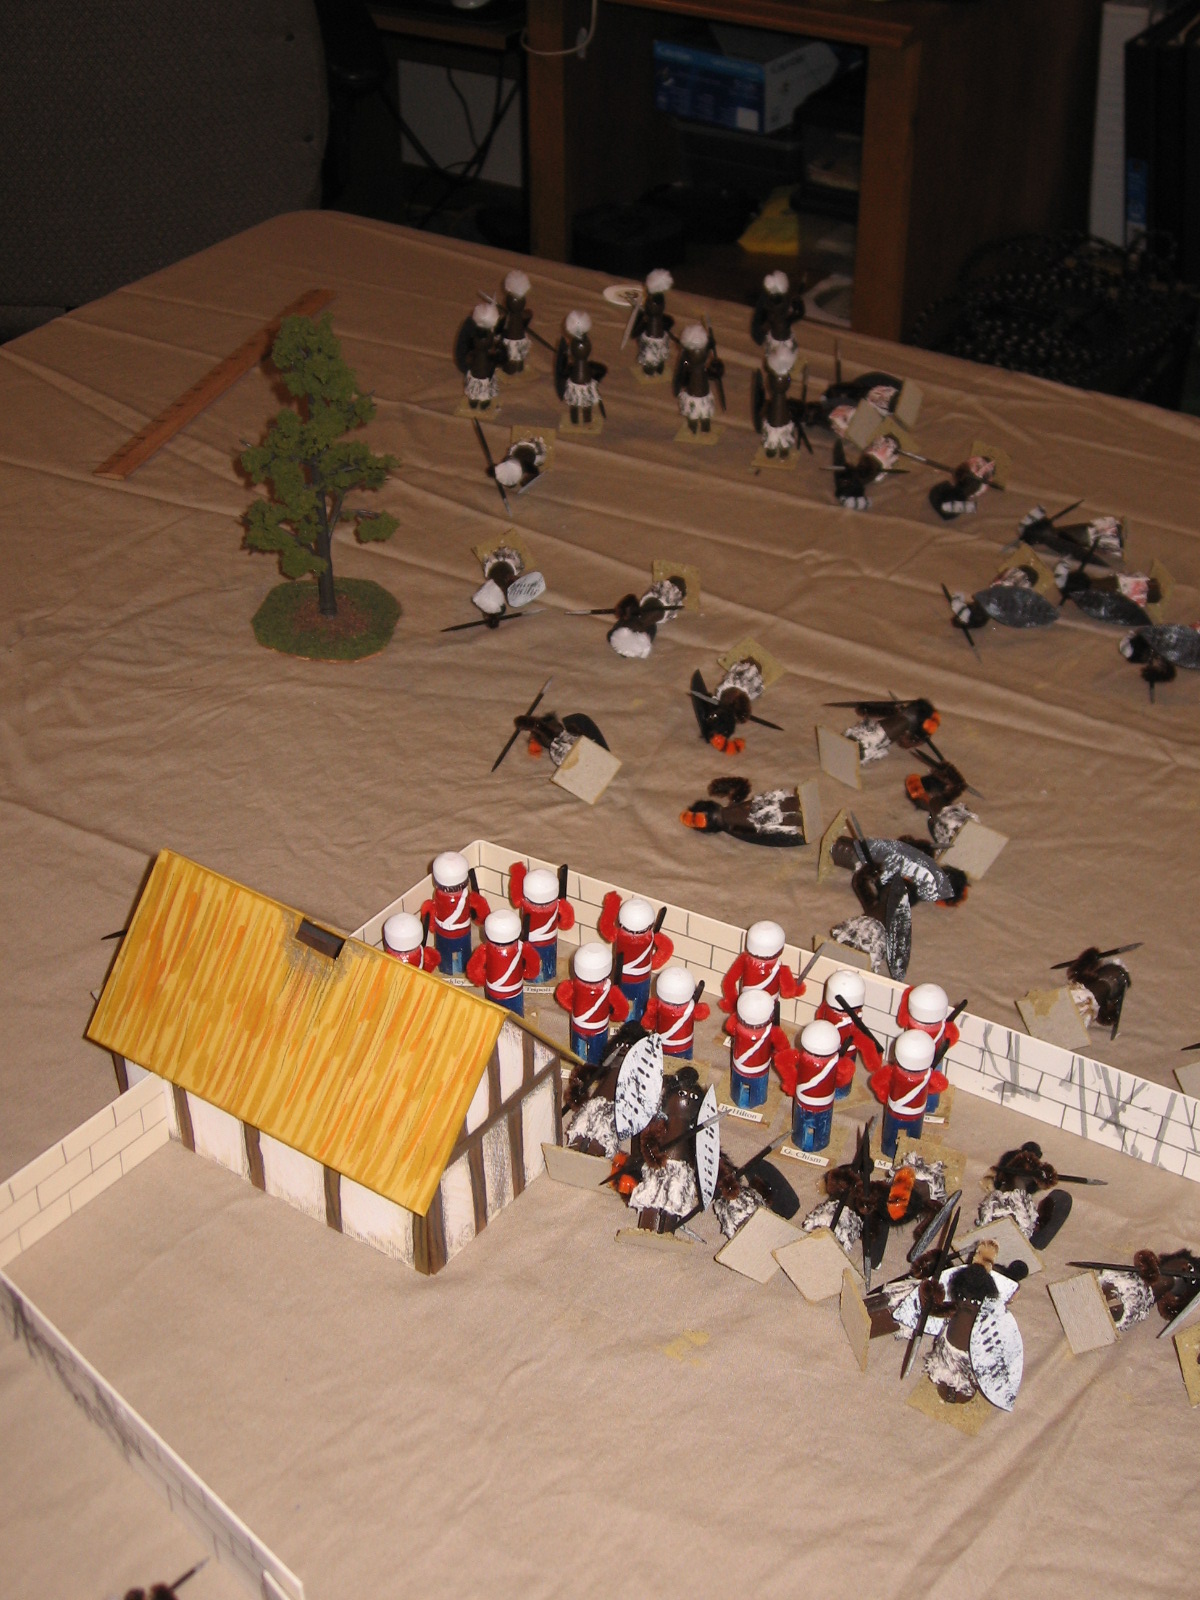
This scene portrays the overall view of the area surrounding Greenwood Station. Lt. Wright and color Sergeant Holtmeyer can be seen in the center of the compound directing the defense. This view looks directly south with First Platoon manning the western perimeter and 2nd platoon defending the eastern wall. If the kind viewer will picture in his mind the standard map depiction of the mission with north at the top of the map the action commenced with the rolling of 1D6 and the clans of tribesmen assigning themselves to entry points along the eastern and western map edge numbered 1,2,3 eastern edge and 4,5,6 western edge.

Morning of the 16th. First Wave assault would prove to be the big push as four clans descended on the mission garrison. Attacking from sections 1, 5, 6.

The attack coming from the western edge three clans strong.


The single clan attacking in stealth from the northeast.


Aftermanth of wave one. Seven soldiers incapacitated and one walking wounded. Pvt. Tripoli is wounded but fit for service.


Wave two can be seen poised for the assault.
May 17th. Wave two begins. Attacks come simultaneous from the west and east.
North is the right map edge. Map is oriented west at top.

The desperate gamble. Lieutenant Wright decides to bring full fire power onto one clan and then about face and hit the second attacking clan.

Look out their behind you.

Wave two saw the most agressive hand to hand.
"At one hundred yards; volley fire. Front rank fire! Second rank Fire!!

Initiative rolls allowed the puma clan to close with the converged 1st and 2nd platoon defenders.

Color Seargent Holtmeyer falls and recieves his first of many mortal wounds.

Brutal hand to hand fighting had the 12th Reg. winning but unable to break from the continued reinforcement of the assault. Abismal shooting in one bound could have pulled their biscuits from the fire but was to no avail.....

Second wave created 4 more walking wounded and 3 incapacitated and reporting to the infirmary.

The dead lay in piles.

The wounded in the hospital.

Pvt. Stuckey was pulled from a pile of dead zulu and added to the walking wounded.

Third wave was a half hearted attack from a single clan. Converged firepower kept them from even closing to hand to hand.

Fourth wave was a final single clan attack and again - firepower kept the enemy from closing to hand to hand.

GASLIGHT rules. Homemade figgys.

End of action.
Greenwood Station will post it's wounded and KIA list.
Seargent Holtmeyer, color guard, KIA
1st Platoon 12th Foot
Pvt. M Ashley KIA
Pvt. A Bowen KIA
Pvt. A Fisher KIA
2nd Platoon 12th Foot
Pvt. M. Johnson wounded
Pvt. Reinhardt KIA
Pvt. R. Tapson wounded
Thanks for looking in on this project.